I love before and afters: the boring one bedroom house that becomes a charming cottage with new paint, a picket fence, some flowers. Or the pallets upcycled into headboards, tables and bookshelves. I had transformation in mind when I saw this cabinet at Second Use in Seattle.

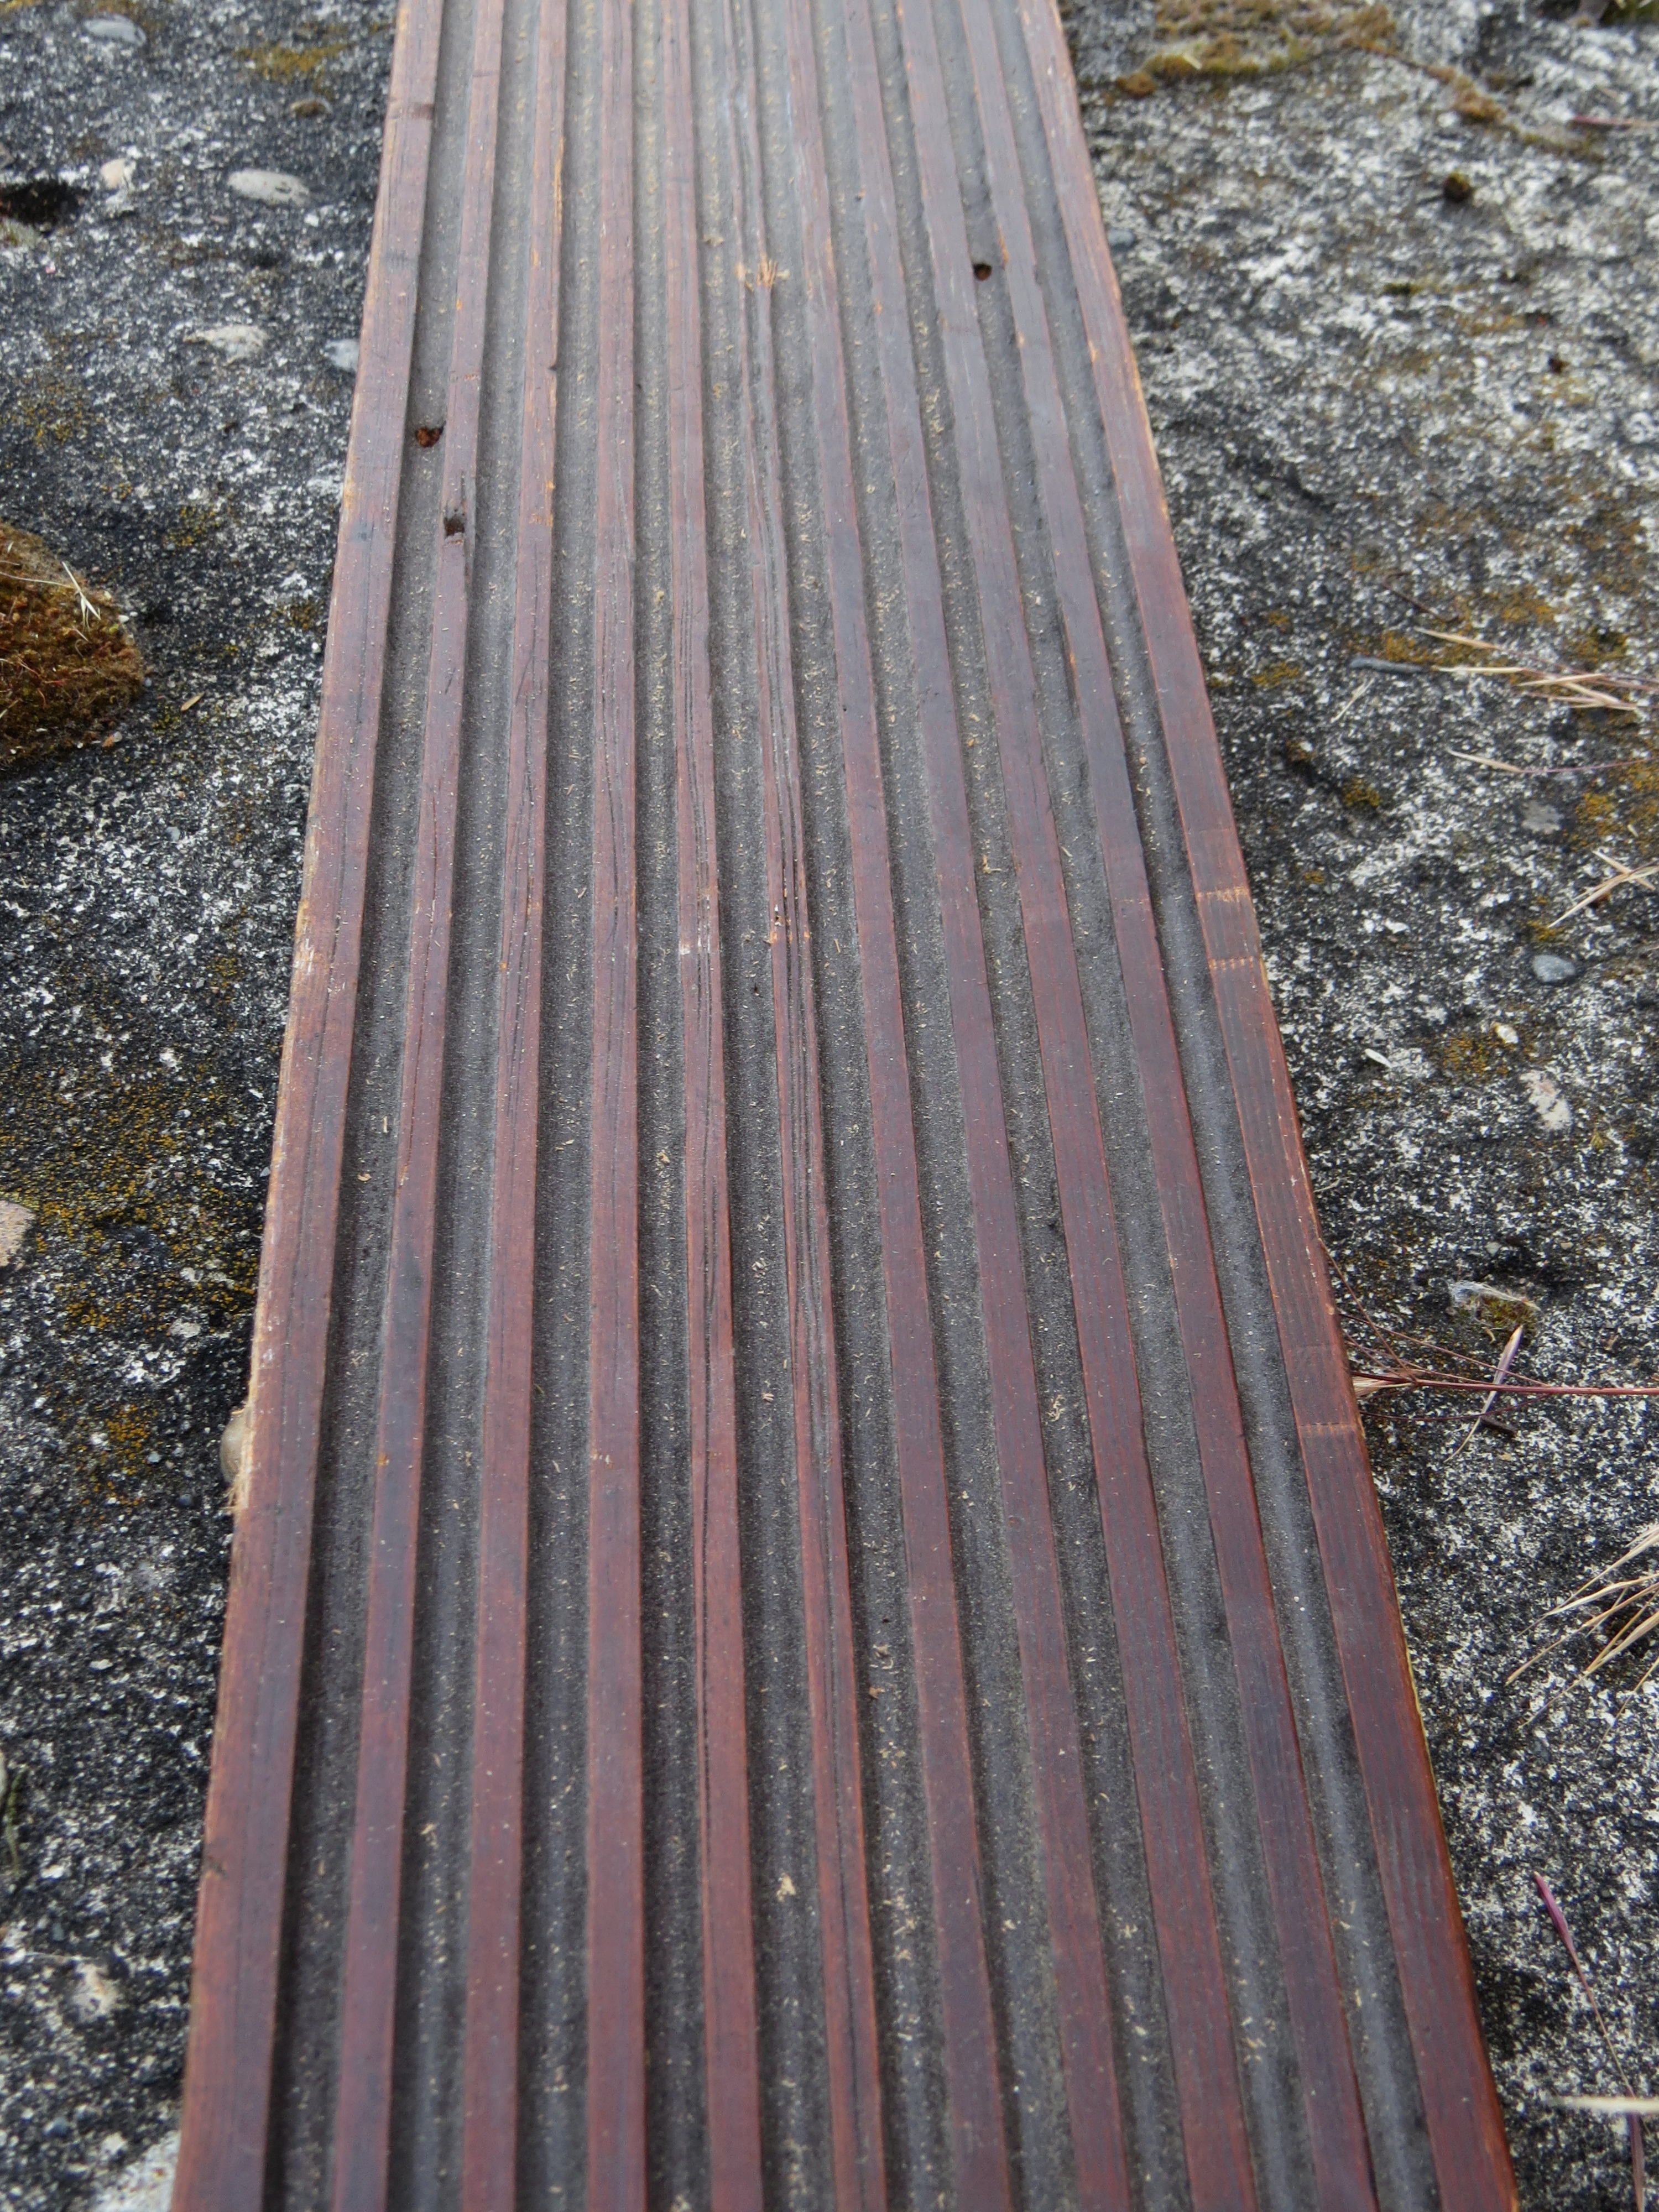
Once I found the cabinet, I set it aside and went looking for more embellishments to upcycle and that’s when I found this lovely striated trim board with hints of paint along the edges.
Perfect. I started a sketch in my mind and when I got home, I completed it.
And that’s when the project got interesting. I rarely sketch to scale, and so my theoretical ideas don’t always work. I had drawn a drawer on top and a wide base on the bottom with castors, but once I got the trim boards on , I saw that it would be too tall and skinny so I let go of the drawer idea and busied myself with the parts I knew until new ideas sprouted.
First I added galvanized strips which I salvaged from this chair project. 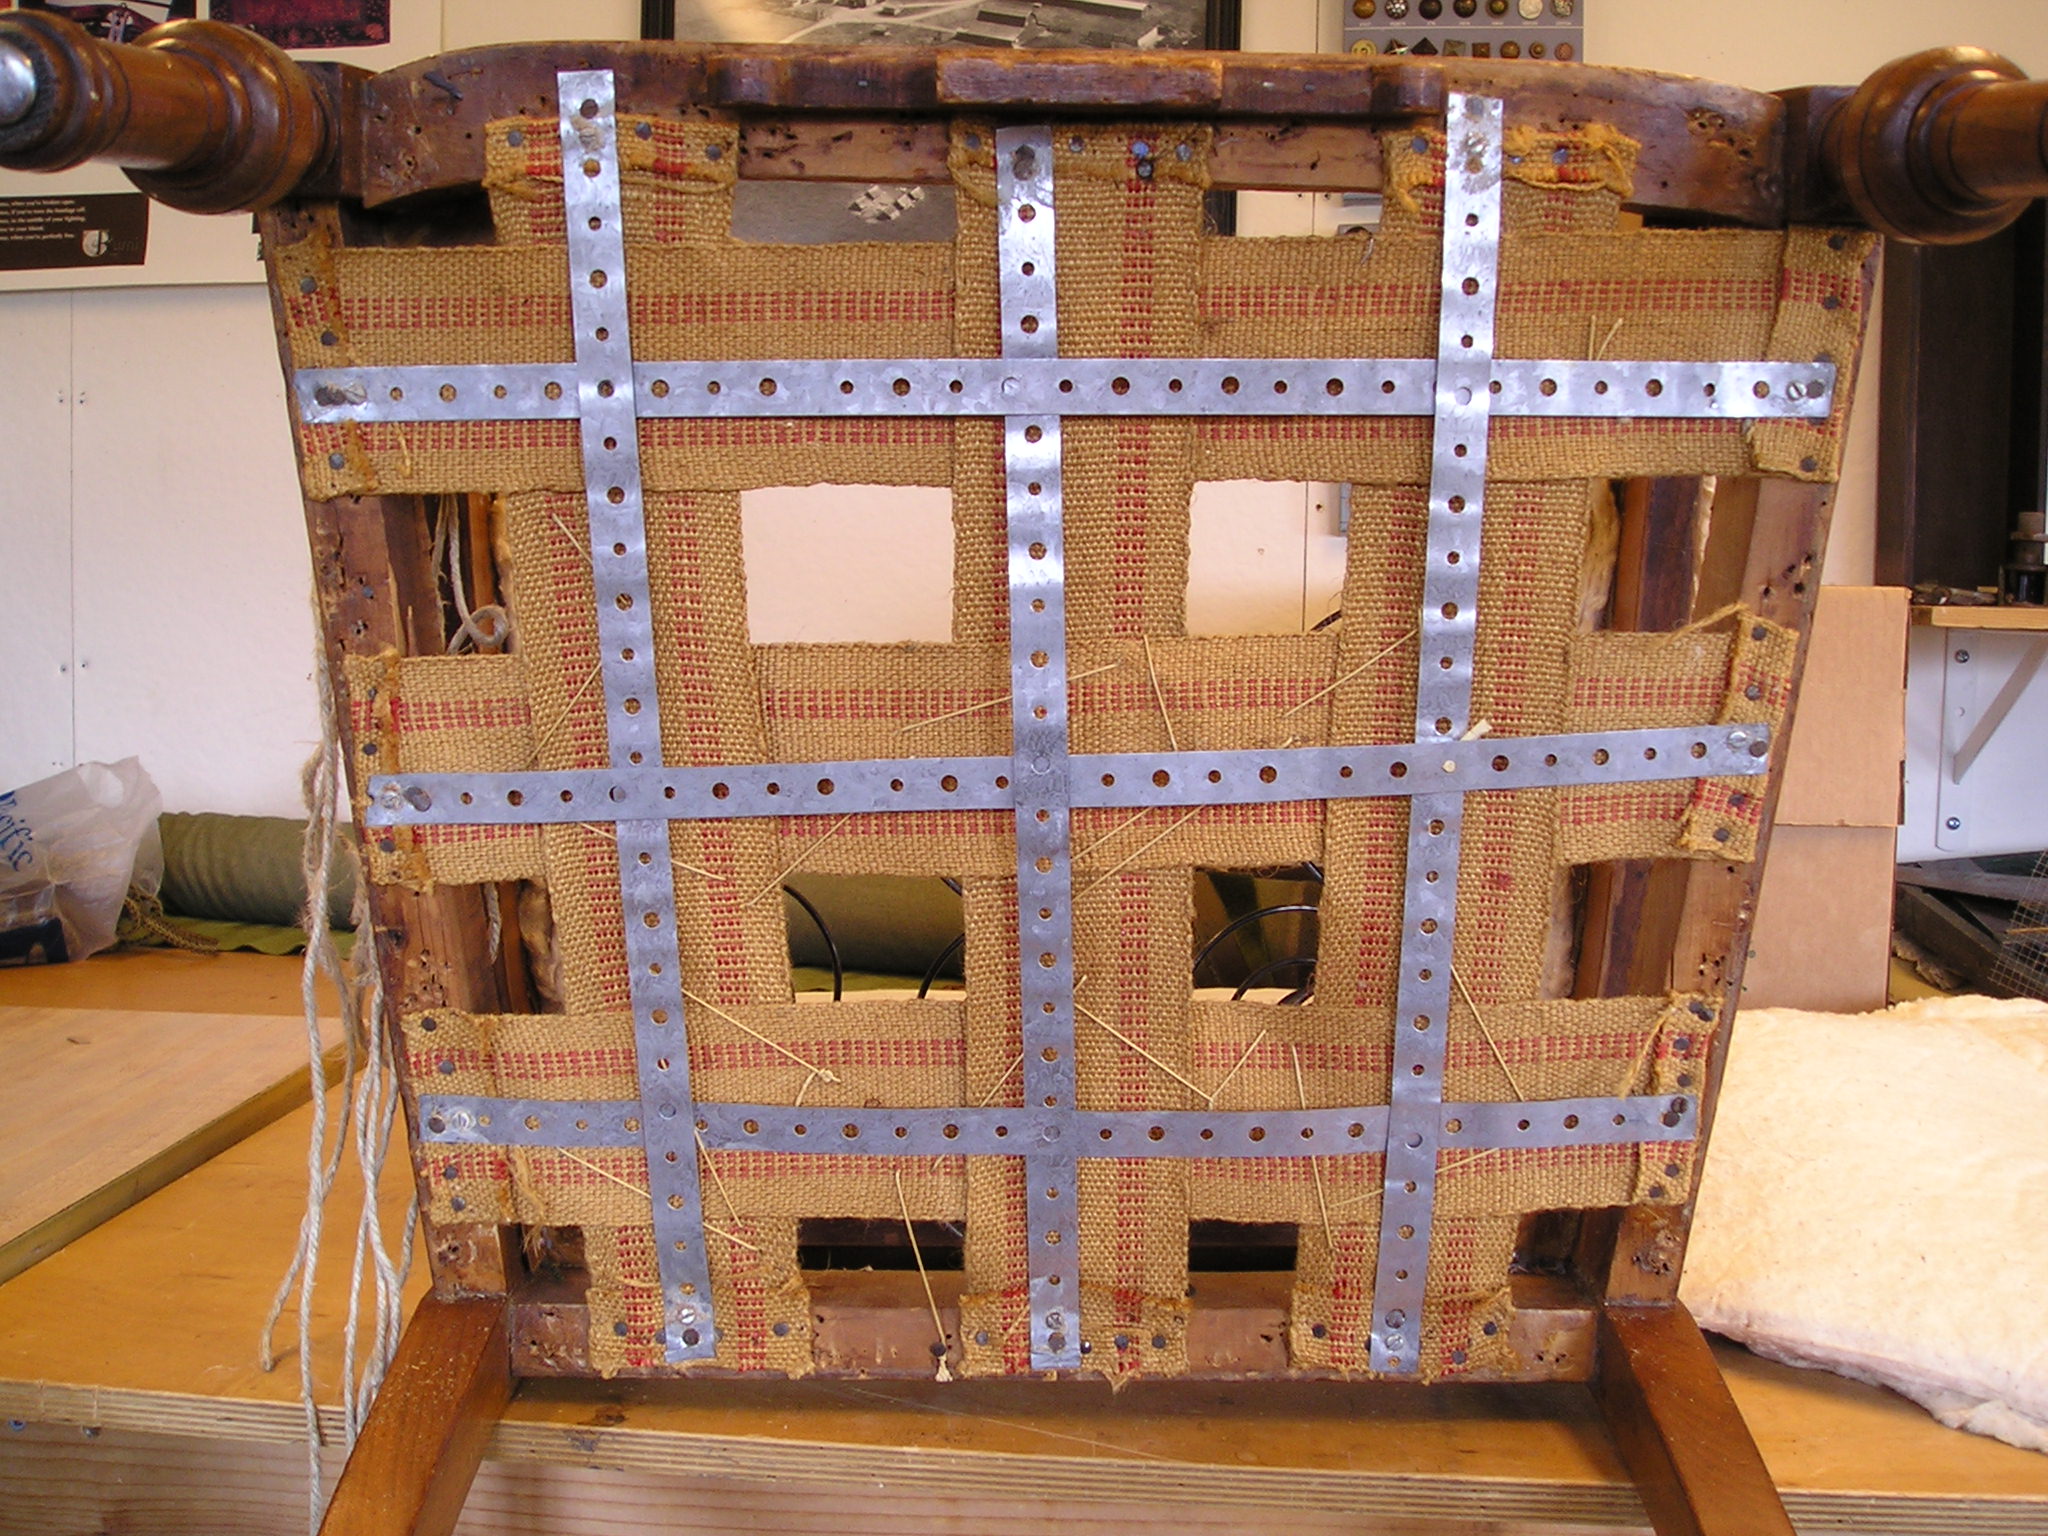
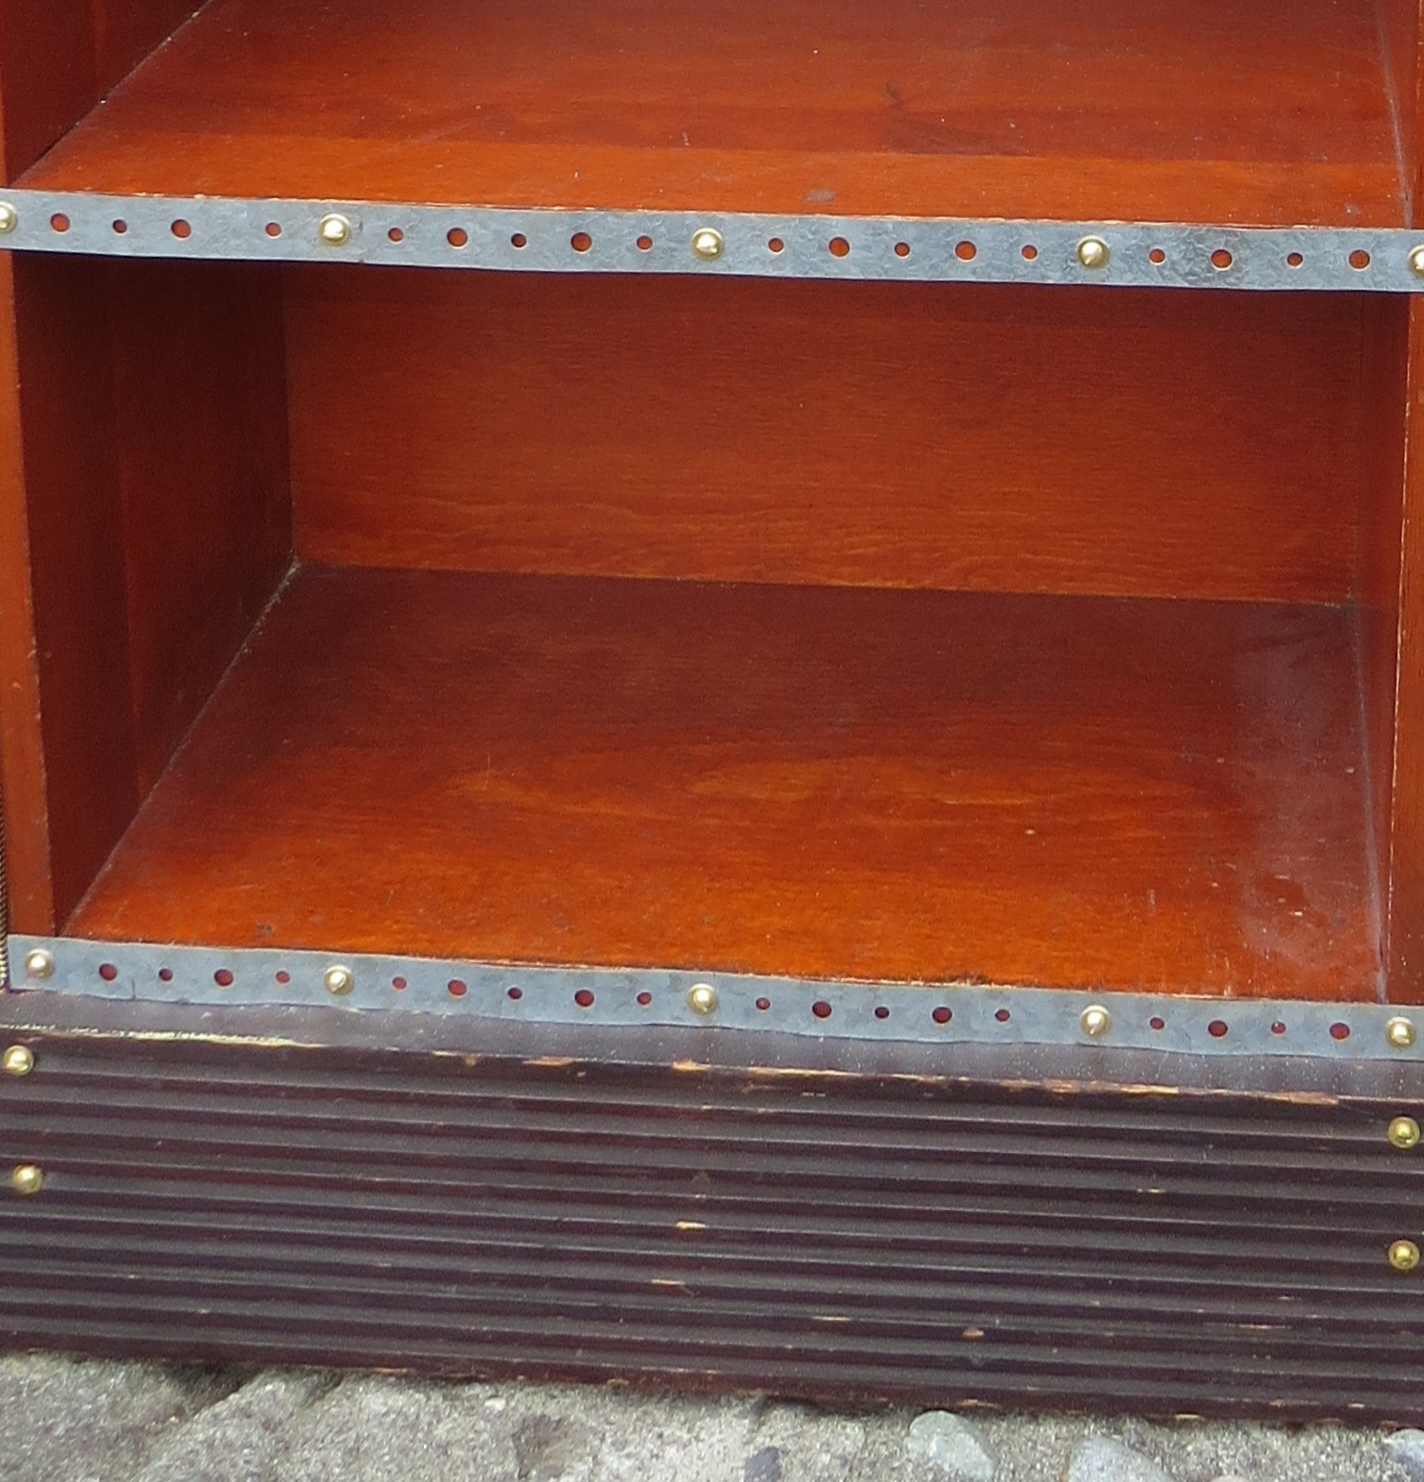
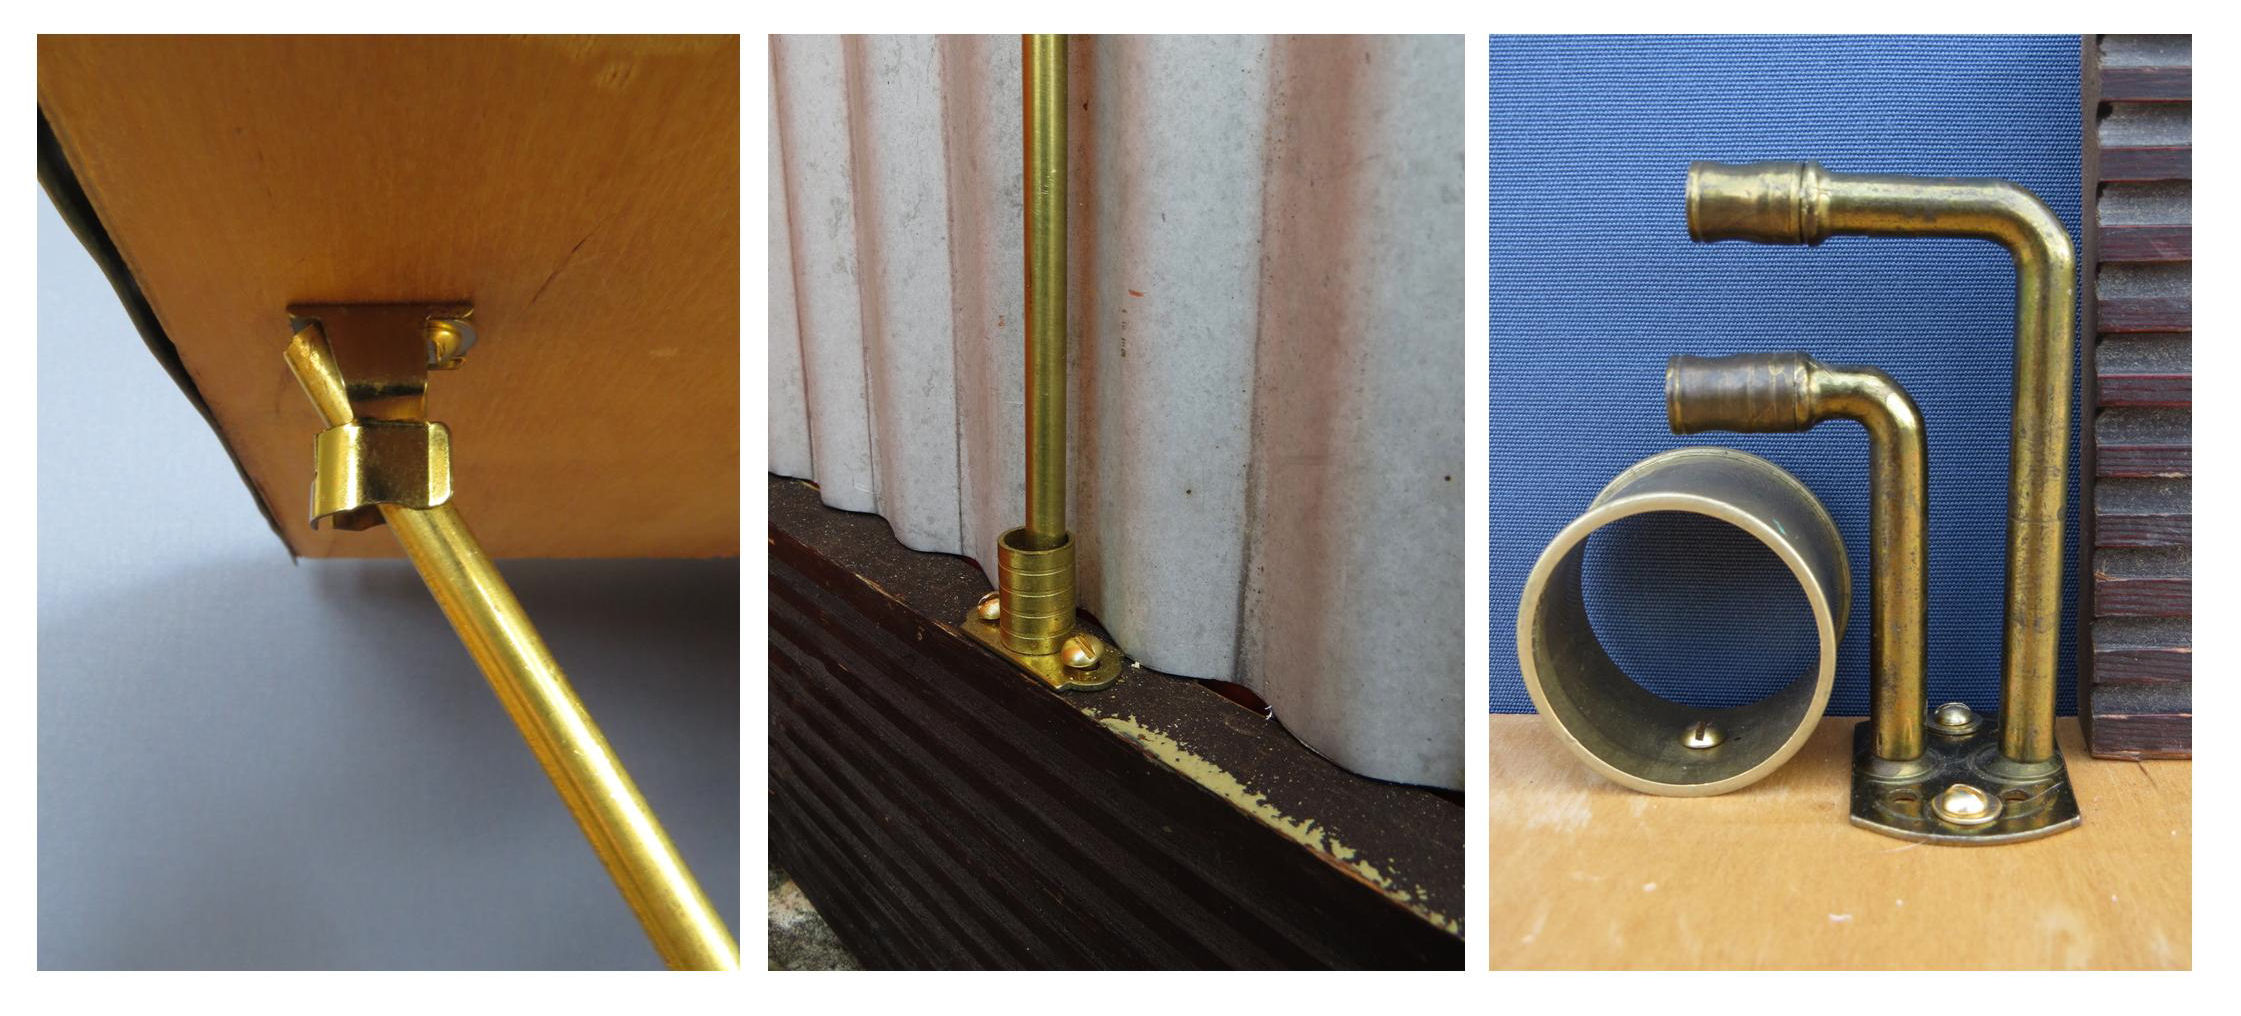
Then, I wanted a nice “step” between the sides and front. That’s when the idea of brass zipper teeth arrived. I pulled one zipper apart and stuck down the half with double stick tape, then placed the galvanized siding along that. 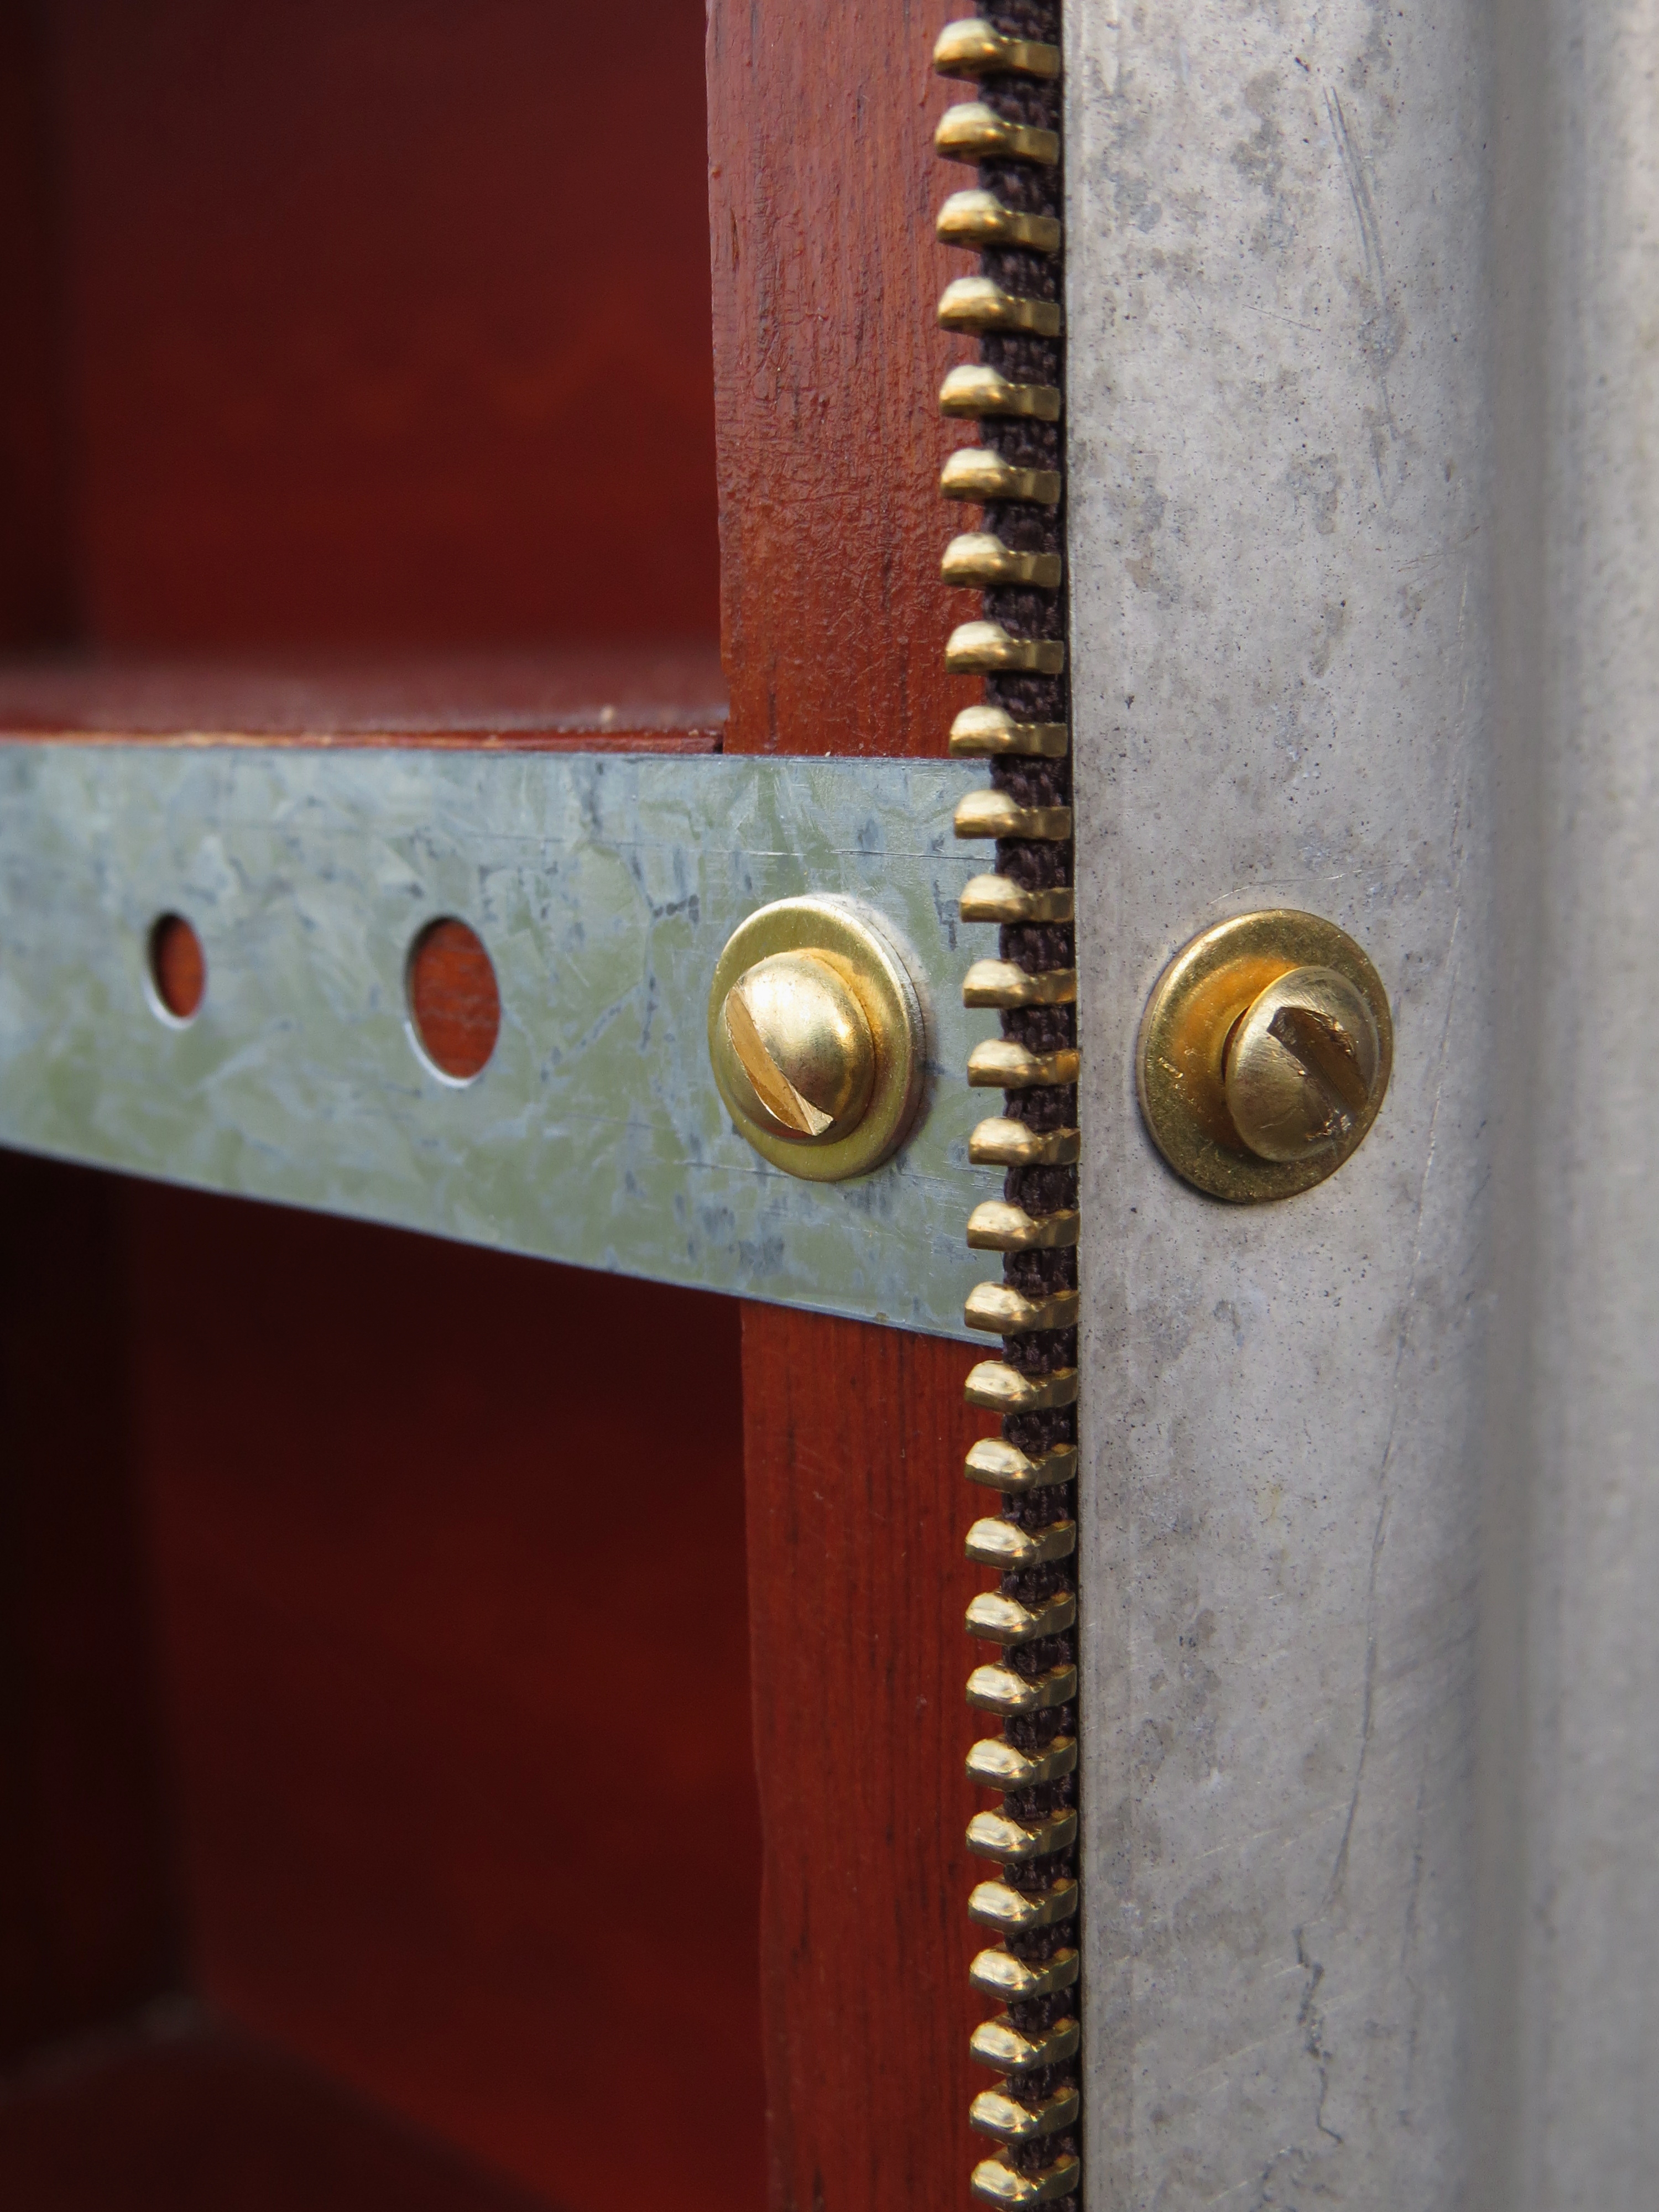
Now it was time to decide on the top. I wandered into the garden shed where I keep my wood scraps looking for a top, and found an old shelf with rounded corners and interesting details in the wood grain. It was much wider than the cabinet, so another series of problems presented themselves. Should I cut the shelf down? Find some brackets? I added the two brass corner pieces that I rejected for this project and then tried out these ideas:

Then I drew more sketches and decided that I wanted a bigger curve. I spent hours sitting in my desk chair looking at my progress, trying to engineer creative solutions. Originally, I bought a 3/16″ rod that was 12″ long. I flattened the ends and curved it (picture above), but it was too thin and short. The long overhang required something more substantial. Next, I bought a 1/4″ x 36″ rod and cut it in half. That didn’t work at all. The end cracked when I attempted to pound it flat and the 18″ was too short to bend. So I took the second 36″ rod and found that it had a nice, natural bend if I used the full length. But how could I hold it in place?
I set to work on the top embellishments while I pondered solutions for the rod. That required even more sitting and looking. And sitting and looking. And more sitting. And a long break.
Coming back to the project with an open mind, I discovered that I could use the brass curtain rod holders for the curved rod, one style for the bottom, and one style for the top. And then another style for the decoration on top.
 And here is the final result.
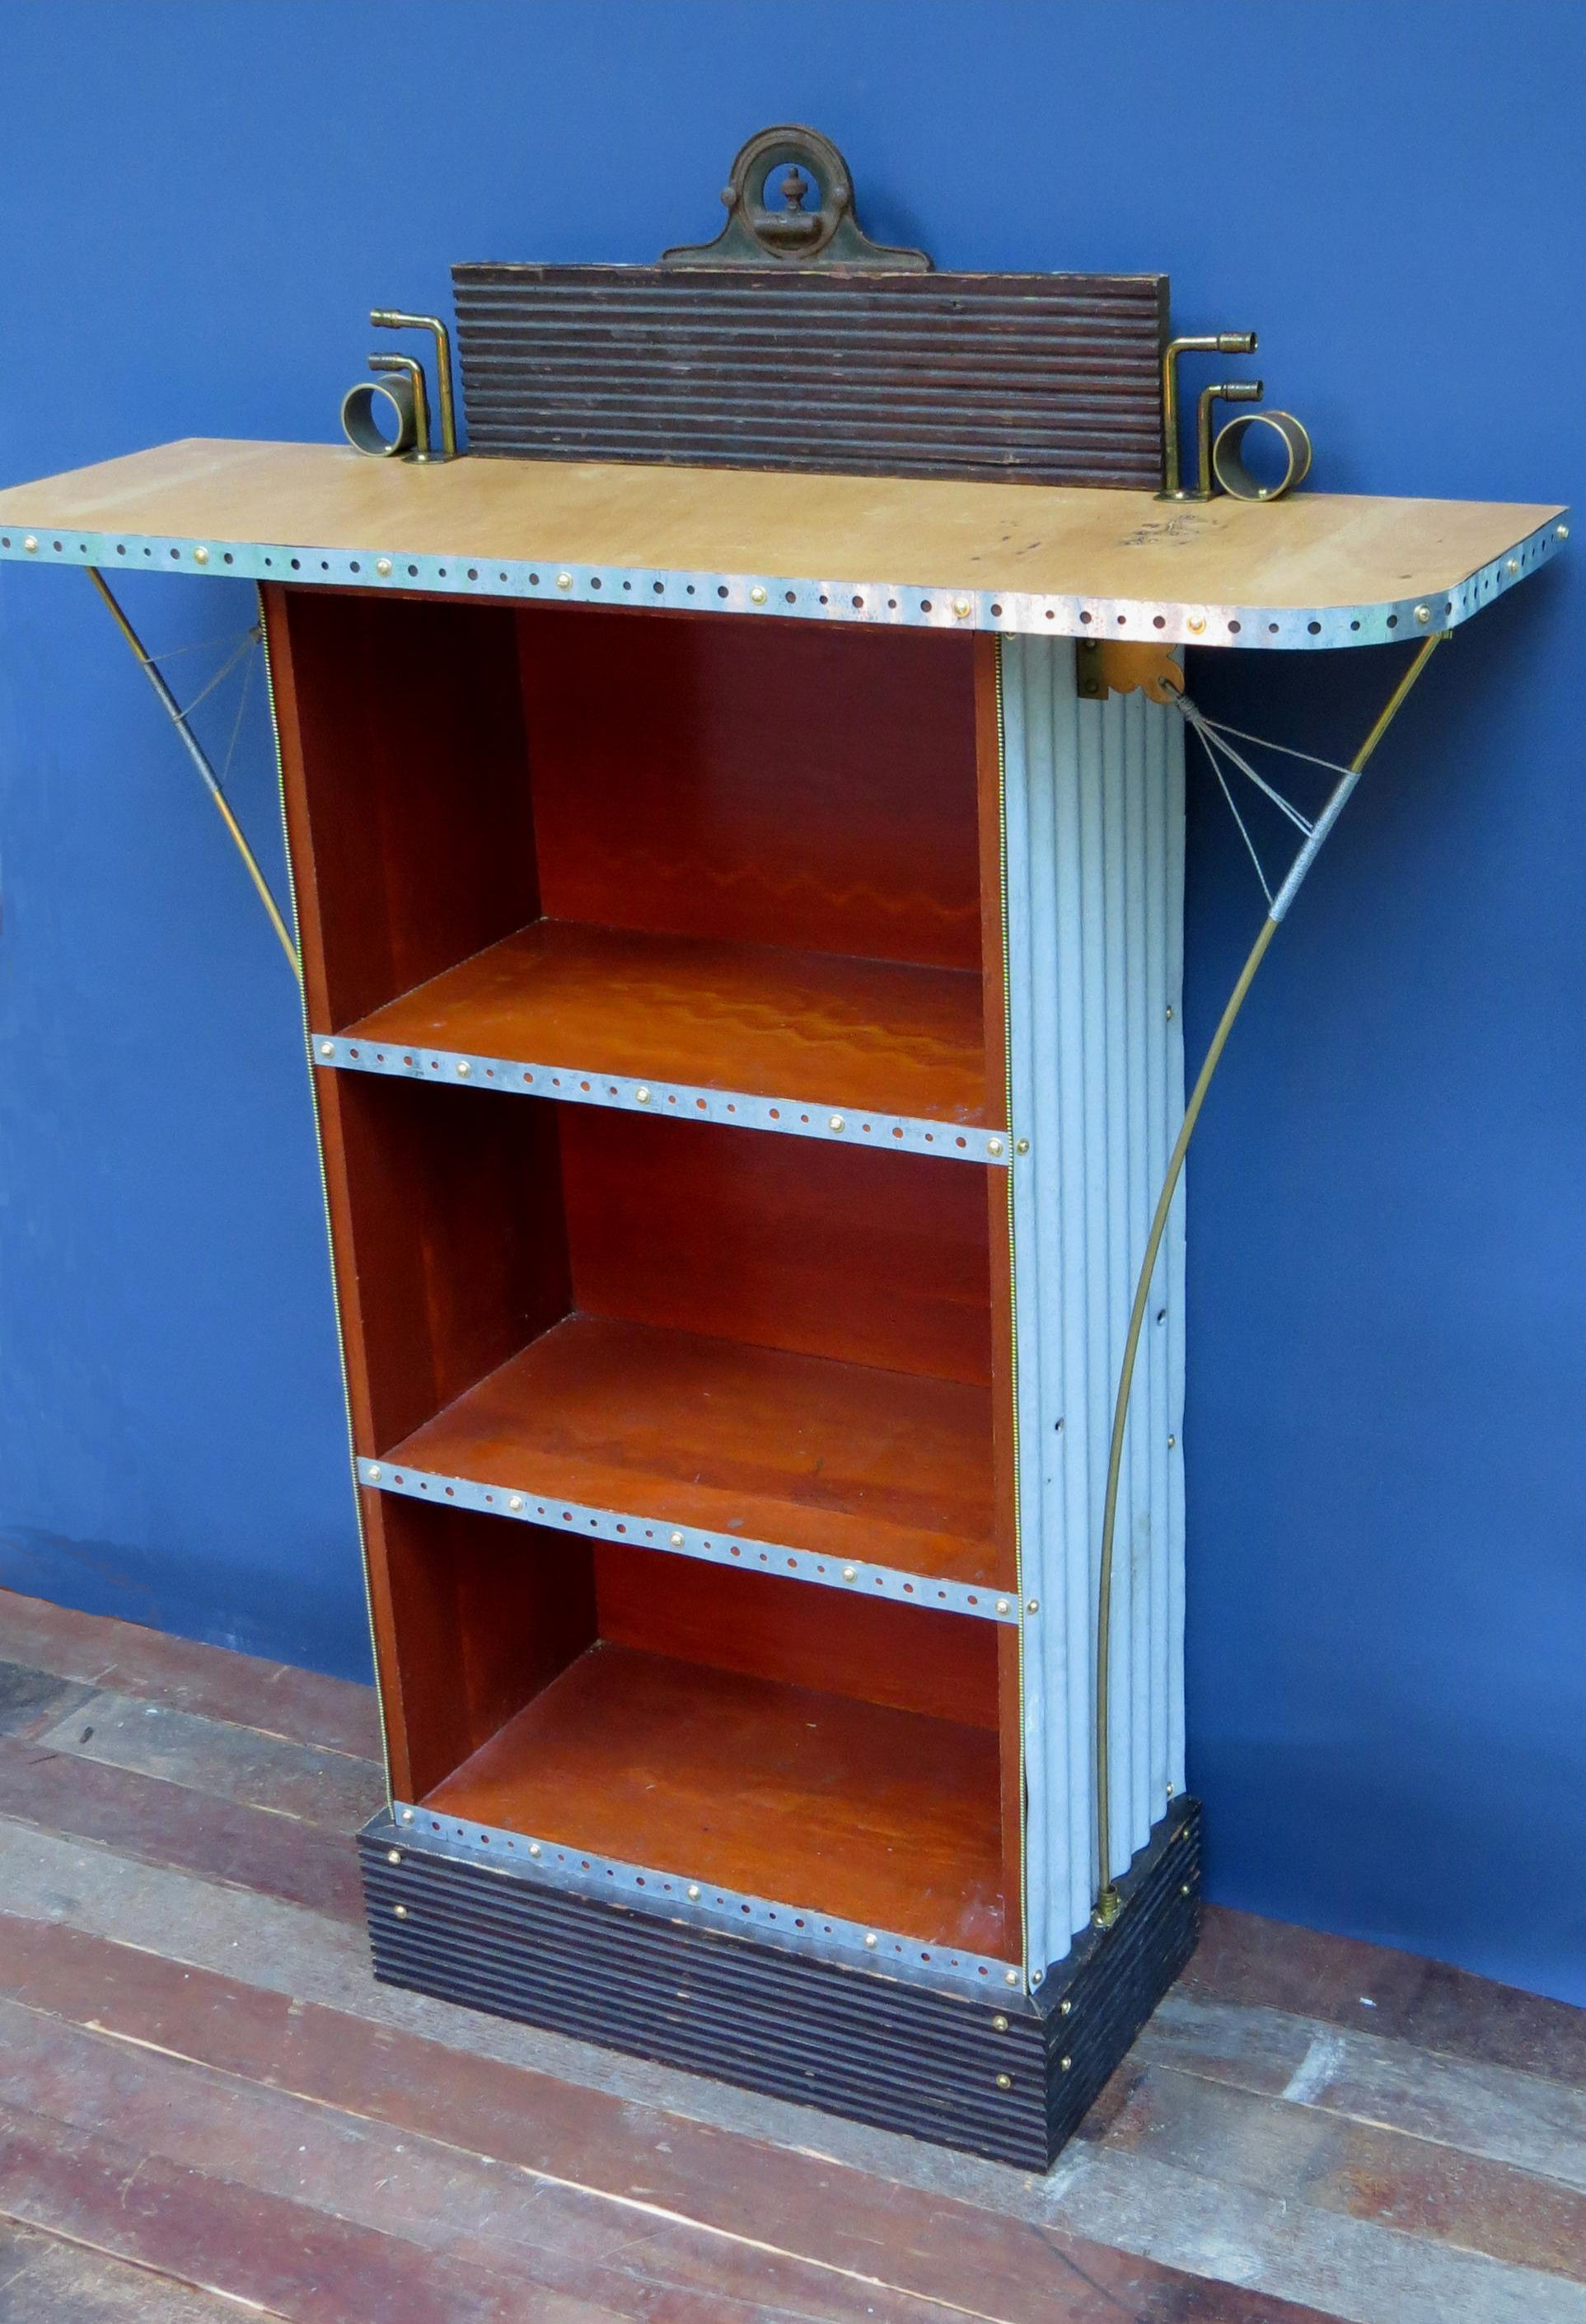

GASP!!!!! this is delightful! I LOVE the story too! the level on top, the ‘wings’ ….. swoon!
Thanks for swooning Jessica! Tickles my heart. And glad to hear you liked the story too.
Wonderful, creative, and just plain COOL!!
Thanks Puma woman!! And it was so much fun to make…
What an amazing transformation! You found the funkiest additions that all seemed to come together so well. And it’s completely practical, as well. I’d love to see the room that it winds up in.
Thanks so much for your enthusiasm! Funky is right, which is why the process excites me so much. It was actually a gift, but I might still get some follow up photos.